Admin quickstart
Create a role that grants one folder, invite a teammate into it, and check what they can reach. The order matters, so build the role first.
In quickS3, nobody can open a bucket until a role says they can. This guide sets up one teammate from scratch: you build the role first, then invite them into it. Doing it in that order means you decide exactly what they get before they ever sign in, and the next person who needs the same access gets the same role.
You need to be an Owner or an Admin, and at least one storage connection has to exist. If there isn’t one yet, an Owner starts with Connect your first bucket.
1. Create the role
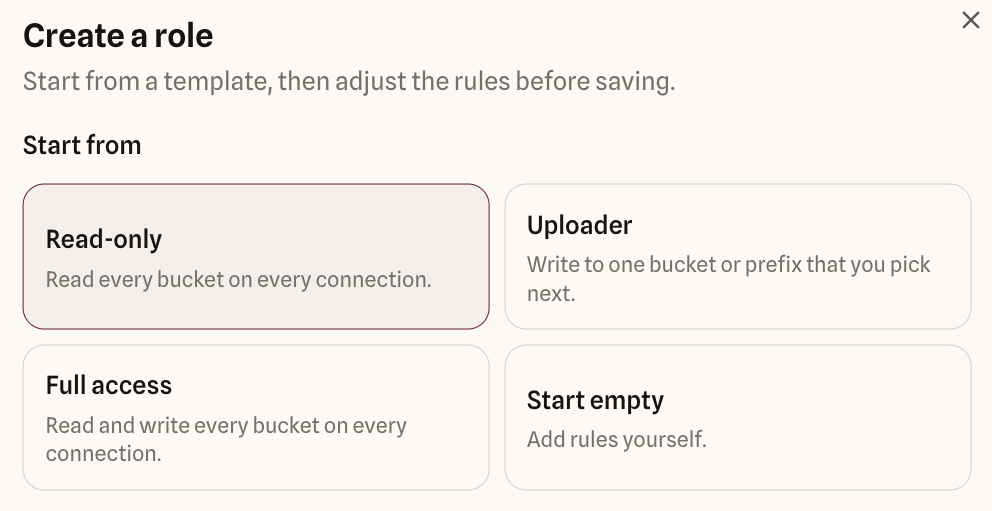
- Open Roles and select Create role.
- Pick a starting point. For a teammate who should work in one folder, choose Uploader. It creates a single rule you can narrow down.
- Give the role a name that says what it’s for, like “Finance reports”, and select Create role.
The role editor opens with the template’s rules filled in but not saved yet. Check each rule before you save:
- Connection and Bucket: where the rule applies.
- Prefix: the folder inside the bucket, for example
reports/. Leave it empty to cover the whole bucket. - Read lets them browse, preview, download, and share files. Write lets them upload, and also overwrite, delete, and create folders.
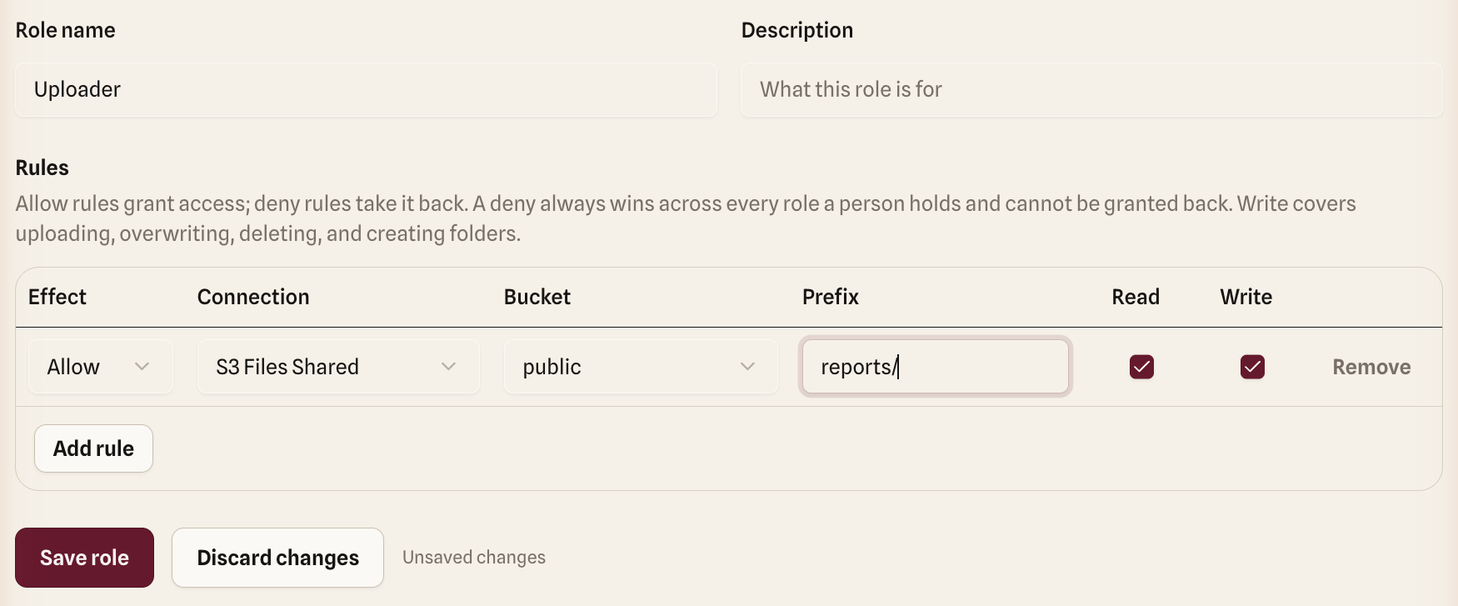
reports/ in the public bucket.- Select Save role.
2. Invite your teammate
- Open People and select Invite.
- Enter their email address.
- Tick the role you just made. Tick Admin as well only if they should help run the organisation (it gives no file access on its own).
- Select Send invite.
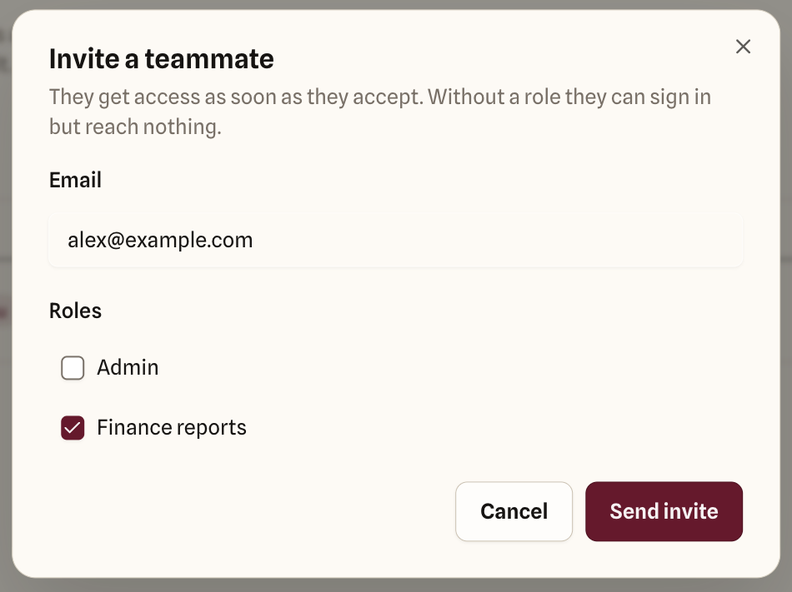
They get an email with a link. Until they accept, they show in the People list as Invited, and you can select Cancel invite to withdraw it. An invitation expires after seven days; if that happens, invite them again.
3. Check what they can reach
Once they accept, their row turns Active, and the Access column sums up their roles, for example “Read & write · 1 rule across 1 bucket”. If it says No access, they have no role with an Allow rule yet: select their roles and tick one, then Save.
To confirm it works from their side, ask them to open Overview. They should see only the bucket in your rule. When they open it, the top level shows just the reports/ folder, and everything outside it stays hidden. Anything they do is recorded in the audit log.
Things that catch people out
Write includes delete
There’s no upload-only permission. A role called “Uploader” with Write on a whole bucket lets that person delete anything in it. Narrow Write to a prefix when you can.
Admin isn’t file access
Admins manage people and roles, but they can’t open a bucket unless one of their roles grants it. Only Owners can reach everything.
Deny always wins
If any of someone’s roles has a Deny rule, an Allow in another role won’t undo it. Remove or narrow the Deny instead. Allow and deny rules explains how rules combine.